
Survival Skills for Wilderness Adventures: How to Stay Safe Outdoors Picture this: You’re deep in the woods, surrounded by towering trees, the sound of a nearby stream trickling, and the crisp air filling your lungs. But suddenly, your GPS loses signal, the sun begins to set, and you realize you’re lost. Would you know what to do? Outdoor adventures can be exhilarating, but they also come with risks. Whether you’re an avid camper, hiker, or fisherman, having the right outdoor survival skills can mean the difference between a minor inconvenience and a life-threatening situation. In this guide, we’ll cover essential survival tactics, including fishing tips, how to choose the best camping gear, and strategies to set up a secure campsite. Whether you’re embarking on a solo trip or a group expedition, these expert insights will prepare you for any challenge. Essential Outdoor Survival Skills Every Adventurer Should Know 1. Mastering Fire-Building Techniques A fire isn’t just for warmth—it’s crucial for cooking, purifying water, and signaling for help. Follow these steps to build a fire in any condition: Find dry tinder (birch bark, dry leaves, cotton balls coated in petroleum jelly). Use the teepee method—place small sticks in a cone shape around the tinder. Gradually add larger wood while maintaining airflow. If it’s raining, use waterproof matches or a magnesium fire starter. Pro Tip: Always have a fire-starting kit in your survival pack. 2. Finding and Purifying Water in the Wild Dehydration can be a silent killer. If you don’t have bottled water, try these methods: Locate freshwater sources like streams, rivers, or collected rainwater. Boil the water for at least 1 minute to kill bacteria. Use portable water filters like LifeStraw or iodine tablets. Case Study: A study from the CDC found that 90% of backcountry water sources in the U.S. contain harmful bacteria. Always purify your water! 3. Building a Safe Shelter A proper shelter protects you from the elements and helps retain body heat. Choose a location away from flood zones and strong winds. Tarp shelter: Lightweight and easy to set up with ropes. Lean-to: Ideal in wooded areas, using tree branches and leaves. Snow cave: Essential for winter survival, providing insulation against the cold. Fishing Tips for Survival and Recreation Fishing isn’t just a hobby—it’s a crucial survival skill. Whether you’re catching fish for food or sport, choosing the right fishing rod and using proper techniques matter. 1. Choosing the Right Fishing Rod for Wilderness Fishing The best fishing rod depends on where and what you’re fishing for: Telescopic rods – Compact and perfect for backpacking. Spinning rods – Versatile for various fish species. Fly fishing rods – Best for streams and rivers. 2. The Ultimate Guide to Freshwater Fishing Techniques Bottom fishing: Best for catching catfish or carp in deep waters. Fly fishing: Effective in fast-moving rivers. Trolling: Dragging bait behind a boat for larger fish. Expert Insight: “Knowing when and where to fish is just as important as the technique. Dawn and dusk are often the most productive times,” says professional angler John Smith. Best Camping Gear for a Safe and Comfortable Trip 1. Must-Have Camping Essentials Investing in the best camping gear ensures a comfortable experience: Sleeping bag: Choose based on the season and insulation rating. Tent: A waterproof, well-ventilated tent is a must. Survival knife: Useful for cutting wood, preparing food, and protection. Headlamp or flashlight: Essential for nighttime navigation. First aid kit: Include bandages, antiseptics, and medications. 2. How to Set Up a Campsite Like a Pro Pick a flat, dry spot at least 200 feet away from water sources. Check for falling hazards like dead tree branches. Store food properly to avoid attracting wildlife—use bear-proof containers. Keep your fire pit at a safe distance from tents. Hiking Trail Recommendations for Every Skill Level Best Hiking Trails for Beginners in the U.S. If you’re new to hiking, start with beginner-friendly trails: Blue Hills Reservation, Massachusetts – Gentle slopes, scenic views. Great Smoky Mountains National Park, Tennessee – Easy loops with wildlife sightings. Yosemite Valley Loop Trail, California – Stunning views with minimal elevation gain. Pro Tip: Always check trail difficulty, weather forecasts, and carry a detailed map or GPS device. How to Plan a Successful Wilderness Survival Trip 1. Create a Wilderness Survival Checklist Before heading out, ensure you have: ✔ Navigation tools (GPS, map, compass) ✔ Food and water supplies ✔ Shelter and warmth essentials ✔ Emergency medical supplies ✔ Multi-purpose tools and fire starters 2. Training and Preparation Take a basic survival course—many are available online. Practice setting up camp before you go. Learn basic first aid and CPR techniques. Social Proof: Outdoor expert Bear Grylls states, “Preparation is the key to survival. The more you train, the safer you’ll be.” Conclusion: Ready to Take on the Wild? Survival skills are crucial for anyone venturing into nature. Whether you’re fishing, camping, or hiking, the right knowledge and preparation ensure safety and enjoyment. By equipping yourself with the best gear, mastering survival techniques, and staying aware of potential risks, you can confidently explore the great outdoors. Next Steps: ✅ Share this guide with fellow adventurers. ✅ Subscribe to our newsletter for more outdoor survival tips. ✅ Check out our recommended best camping gear and fishing essentials here! All Posts Hobbies DIY Pet Toys: Fun and Affordable Ways to Keep Your Dog Entertained Read More The Ultimate Skincare Routine for Glowing Skin: A Step-by-Step Guide Read More DIY Bathroom Remodeling: Transform Your Space Without Breaking the Bank Read More DIY Woodworking Plans: How to Create Stunning Home Decor with Wood Read More Recording Music at Home on a Budget: The Best Equipment and Software Read More How to Make Stunning Handmade Jewelry at Home: A Step-by-Step Guide Read More Mastering the Rule of Thirds: How to Improve Your Photography Composition Read More
Sustainable Gardening: How to Reduce Water Usage and Still Grow Lush Plants
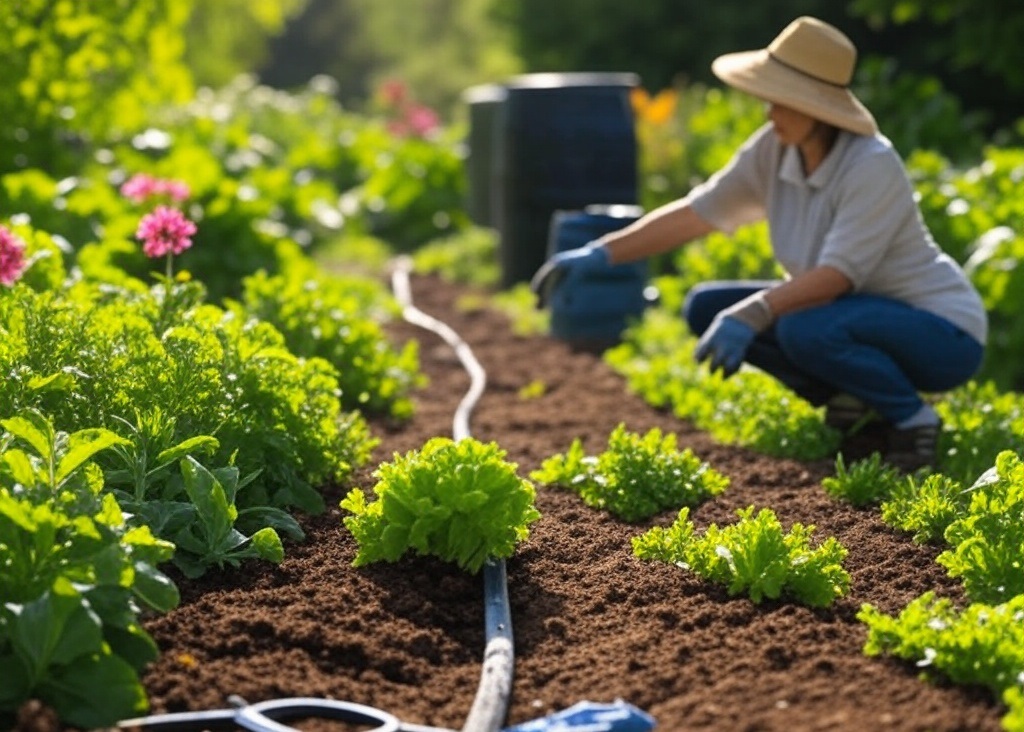
Sustainable Gardening: How to Reduce Water Usage and Still Grow Lush Plants Water is a precious resource, and with climate change intensifying, sustainable gardening is more important than ever. Many home gardeners struggle with maintaining lush, thriving plants while minimizing water waste. The good news? With the right gardening tips, you can reduce water usage without compromising the beauty and health of your garden. In this guide, we’ll explore practical home gardening strategies that help conserve water, recommend the best plants for home, and share proven organic gardening methods to keep your garden flourishing with minimal waste. Why Water Conservation Matters in Gardening The Problem: Excessive Water Waste in Gardening According to the Environmental Protection Agency (EPA), outdoor water use accounts for nearly 30% of total household water consumption in the U.S., and a significant portion is wasted due to inefficient watering techniques. The Solution: Smart and Sustainable Gardening Practices By adopting water-efficient methods like composting techniques for beginners, selecting best indoor plants for small apartments, and using organic gardening principles, you can maintain a thriving garden while significantly cutting back on water use. Water-Saving Gardening Tips 1. Choose Water-Efficient Plants Opting for drought-resistant and native plants can drastically reduce the need for frequent watering. Here are some ideal plant choices: Vegetable Gardening: Tomatoes, peppers, and beans thrive with minimal water. Flower Gardening Techniques: Lavender, yarrow, and coneflowers are great options. Best Plants for Home: Aloe vera, succulents, and snake plants require little water. 2. Improve Soil Health with Compost Healthy soil retains moisture better. Composting techniques for beginners can help enrich soil quality while reducing water runoff. Use kitchen scraps like vegetable peels, eggshells, and coffee grounds. Incorporate mulch to retain moisture and suppress weeds. Rotate crops to prevent soil depletion and increase water efficiency. 3. Implement Smart Watering Techniques Efficient watering methods ensure your plants get the hydration they need without waste. Best Watering Practices: Water Early in the Morning: Reduces evaporation loss. Drip Irrigation Systems: Delivers water directly to roots. Use Rain Barrels: Collect and store rainwater for later use. Sustainable Gardening Methods for Every Space Urban Gardening: How to Grow Organic Vegetables at Home For city dwellers, space-efficient and water-saving techniques are key. Vertical Gardening: Use wall planters and trellises. Self-Watering Containers: Ideal for balconies and patios. Hydroponics: Uses 90% less water than traditional soil gardening. Suburban & Rural Home Gardens If you have more space, focus on xeriscaping—a landscaping method that requires minimal irrigation. Plant drought-tolerant ground cover instead of grass. Create permaculture zones to group plants with similar watering needs. Use shade structures to prevent excessive evaporation. Common Misconceptions About Water-Efficient Gardening Myth #1: Drought-Resistant Plants Look Dull Reality: Many native plants have vibrant flowers and lush greenery. Myth #2: Drip Irrigation is Expensive Reality: DIY drip systems can be installed affordably with basic materials. Myth #3: Compost Attracts Pests Reality: A properly maintained compost pile is odor-free and pest-resistant. Expert Insights on Sustainable Gardening According to Dr. Elaine Ingham, a soil microbiologist, “Healthy soil with high organic matter retains up to 30% more water, reducing the need for frequent irrigation.” Additionally, the University of California Agriculture & Natural Resources recommends planting ground covers like clover to reduce moisture loss by up to 50%. Social Proof: Real-Life Success Stories Case Study: Water-Wise Gardening in Texas A suburban homeowner in Austin reduced their water consumption by 40% using a combination of mulching, drip irrigation, and composting techniques. Their vegetable garden flourished despite ongoing drought conditions. Community Impact: Sustainable Gardening Workshops Local gardening clubs and online communities are helping thousands of gardeners transition to sustainable methods by sharing tips, best plants for home, and innovative flower gardening techniques. Conclusion & Next Steps By implementing these gardening tips, you can create a thriving, water-efficient garden while contributing to a more sustainable planet. Start small—choose drought-resistant plants, improve your soil with composting techniques, and embrace smart watering strategies. Ready to Make Your Garden More Sustainable? Share your gardening journey on social media! Join an online community to exchange sustainable gardening tips. Invest in a rainwater collection system for eco-friendly irrigation. All Posts Hobbies The Best Wood Types for Furniture Making and Their Pros & Cons Read More Survival Skills for Wilderness Adventures: How to Stay Safe Outdoors Read More DIY Pet Toys: Fun and Affordable Ways to Keep Your Dog Entertained Read More The Ultimate Skincare Routine for Glowing Skin: A Step-by-Step Guide Read More DIY Bathroom Remodeling: Transform Your Space Without Breaking the Bank Read More DIY Woodworking Plans: How to Create Stunning Home Decor with Wood Read More Recording Music at Home on a Budget: The Best Equipment and Software Read More How to Make Stunning Handmade Jewelry at Home: A Step-by-Step Guide Read More Mastering the Rule of Thirds: How to Improve Your Photography Composition Read More
DIY Pet Toys: Fun and Affordable Ways to Keep Your Dog Entertained
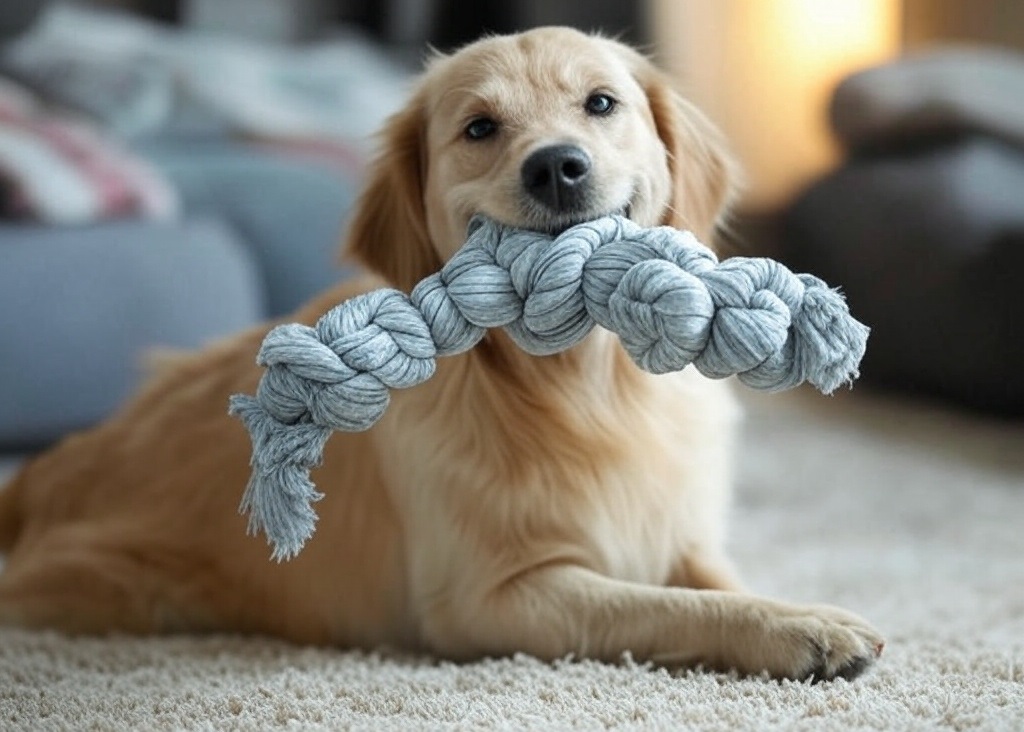
DIY Pet Toys: Fun and Affordable Ways to Keep Your Dog Entertained As a devoted pet parent, you want the best for your furry friend. But keeping your dog entertained without breaking the bank can be a challenge. Store-bought toys can be pricey, and they often don’t last long. The good news? You can make fun, engaging, and durable pet toys right at home using everyday household items! In this guide, we’ll walk you through easy DIY pet toy ideas that promote mental stimulation, encourage exercise, and support pet training tips. Plus, we’ll explore how DIY toys can complement your dog’s overall care, from choosing the right pet food to how to train a puppy to stop biting. Ready to create some tail-wagging fun? Let’s dive in! Why DIY Pet Toys Are a Game-Changer Many pet owners underestimate the benefits of homemade pet toys. Here’s why you should consider making your own: Cost-Effective – Store-bought toys can be expensive, while DIY versions often cost little to nothing. Customization – You can tailor toys to your dog’s size, play style, and chewing strength. Safety – You control the materials, ensuring there are no harmful chemicals or choking hazards. Eco-Friendly – Upcycling household materials reduces waste and benefits the environment. What You’ll Need Before getting started, gather some common household items: Old t-shirts or towels Tennis balls Plastic bottles (with caps removed) PVC pipes Empty cardboard rolls Socks Rope or twine Top DIY Dog Toys and How to Make Them 1. Tug-of-War Rope Toy Great for: Interactive play and pet training tips How to Make It: Cut an old t-shirt or towel into long strips. Tie several strips together in a knot at one end. Braid the strips tightly and knot the other end. Enjoy a game of tug-of-war with your pup! 2. Tennis Ball Treat Dispenser Great for: Mental stimulation and rewarding positive behavior How to Make It: Cut a small slit in a tennis ball. Stuff it with your dog’s favorite treats. Let your pup work to get the treats out! 3. Sock & Bottle Crunch Toy Great for: Teething puppies and dogs that love crunching sounds How to Make It: Take an empty plastic water bottle (remove the cap and label). Insert it into an old sock and tie a knot at the open end. Let your dog enjoy the fun, crinkly sounds! 4. DIY Snuffle Mat Great for: Mental enrichment and slow feeding How to Make It: Cut fleece fabric into strips. Tie them onto a rubber mat, filling every hole. Sprinkle kibble or treats inside for your dog to forage. 5. PVC Pipe Puzzle Feeder Great for: Encouraging problem-solving skills How to Make It: Take a PVC pipe and drill small holes along the sides. Fill it with kibble or treats. Let your dog roll it around to release the food. Complementing DIY Toys with Holistic Dog Care How to Train a Puppy to Stop Biting DIY toys can assist with training by redirecting your puppy’s energy toward appropriate objects. Use tug toys to teach bite inhibition and reward positive behavior with treat dispensers. Choosing the Right Pet Food for Energy & Play A well-balanced diet ensures your dog has the energy to enjoy their toys. Look for high-protein, nutrient-dense options. Some of the best pet food brands offer grain-free and organic choices that cater to different dietary needs. Common Health Issues in Cats (For Multi-Pet Homes) While this guide focuses on dogs, cat owners should also be aware of potential health issues like obesity and urinary tract infections. Providing mentally stimulating toys for your feline friend can keep them active and prevent boredom-related health problems. Best Diet Plans for Overweight Pets If your dog is overweight, incorporate interactive toys that encourage movement, such as puzzle feeders or fetch toys. Pair this with portion-controlled meals to maintain a healthy weight. Common DIY Pet Toy Misconceptions (And The Truth!) Myth #1: DIY Toys Aren’t Durable Truth: Choosing the right materials (e.g., braided rope, thick fabrics) ensures longevity. Myth #2: DIY Toys Aren’t Safe Truth: Unlike cheap store-bought toys with unknown chemicals, DIY toys allow you to select non-toxic, pet-friendly materials. Myth #3: DIY Toys Take Too Much Time to Make Truth: Many of the toys listed above can be made in under 10 minutes! Final Thoughts: The Joy of DIY Pet Toys Creating DIY pet toys isn’t just about saving money—it’s about strengthening your bond with your dog, enriching their environment, and ensuring their happiness. From tug ropes to treat puzzles, the possibilities are endless! Try making a few of these today and watch your dog’s tail wag with excitement. Next Steps ✅ Try making one of these toys today and share your results on social media! ✅ Sign up for our newsletter for more pet training tips and dog care advice. ✅ Explore our recommended best pet food options to keep your dog happy and healthy! All Posts Hobbies Survival Skills for Wilderness Adventures: How to Stay Safe Outdoors Read More The Ultimate Skincare Routine for Glowing Skin: A Step-by-Step Guide Read More DIY Bathroom Remodeling: Transform Your Space Without Breaking the Bank Read More DIY Woodworking Plans: How to Create Stunning Home Decor with Wood Read More Recording Music at Home on a Budget: The Best Equipment and Software Read More How to Make Stunning Handmade Jewelry at Home: A Step-by-Step Guide Read More Mastering the Rule of Thirds: How to Improve Your Photography Composition Read More

The Ultimate Skincare Routine for Glowing Skin: A Step-by-Step Guide
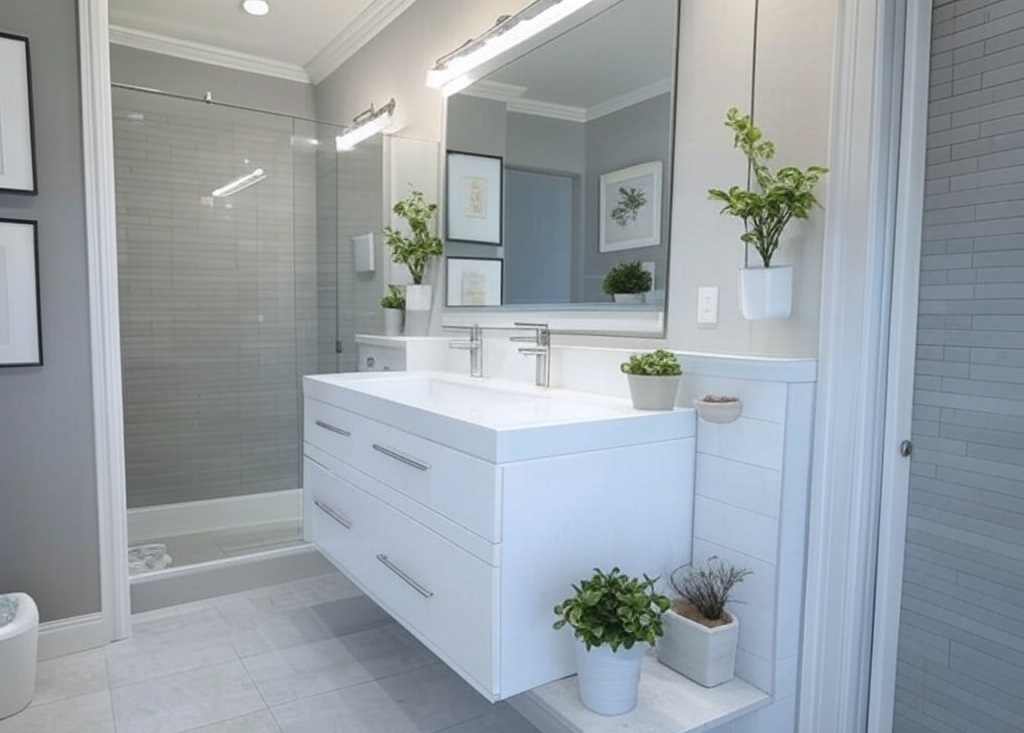
DIY Bathroom Remodeling: Transform Your Space Without Breaking the Bank Renovating your bathroom can be an exciting yet daunting task, especially when you’re on a tight budget. Whether you’re looking to improve functionality, boost your home’s value, or simply refresh your space, a DIY bathroom remodel can save you thousands. The good news? You don’t need to be a professional contractor to achieve stunning results. In this guide, we’ll walk you through budget-friendly home renovation techniques, DIY home projects, and home decor ideas to upgrade your bathroom without overspending. You’ll also discover practical tips, expert insights, and actionable strategies to make your remodeling journey smooth and cost-effective. Why Remodel Your Bathroom? The Benefits of a DIY Upgrade A well-designed bathroom can improve comfort, enhance efficiency, and even increase property value. Here’s why tackling a DIY bathroom remodel is a great investment: Cost Savings – Professional remodels can cost anywhere from $10,000 to $25,000, but a DIY project can be completed for a fraction of that amount. Increased Home Value – A renovated bathroom can boost your property’s resale price by 3-4%. Better Functionality – Customizing your space ensures it meets your specific needs. Energy Efficiency – Installing water-saving fixtures and LED lighting reduces utility bills. Step-by-Step Guide to an Affordable DIY Bathroom Remodel 1. Plan Your Remodel and Set a Budget Before swinging the hammer, establish a clear budget and remodeling plan. Key Considerations: Define your renovation priorities: Do you need a new vanity, fresh paint, or updated lighting? Set a realistic budget: DIY remodels typically cost between $1,500 and $5,000. Research cost-effective materials: Opt for high-quality yet affordable alternatives like peel-and-stick tiles. 2. Choose the Best Paint Colors for Small Spaces Color plays a major role in how spacious your bathroom feels. Lighter shades create an illusion of space, while dark hues can make a room feel smaller. Recommended Colors: Soft gray Pale blue Warm beige Classic white Pro Tip: Use moisture-resistant paint to prevent mold and mildew. 3. Upgrade Fixtures and Hardware Swapping out outdated fixtures is one of the easiest ways to refresh your bathroom. Consider: Installing a new faucet or showerhead Replacing cabinet handles and drawer pulls Updating towel racks and toilet paper holders Look for energy-efficient home upgrades, such as WaterSense-certified showerheads to conserve water. 4. Replace or Resurface Bathroom Tiles New tiles can be expensive, but you can achieve a modern look without a full replacement: Peel-and-stick tiles – Affordable and easy to install. Tile paint – Covers outdated designs without removing tiles. Regrouting – Makes old tiles look new again. 5. Improve Storage with Smart Solutions Maximize space and keep essentials organized with: Floating shelves for extra storage Over-the-toilet storage racks Wall-mounted baskets for toiletries 6. Install Budget-Friendly Lighting Brighten up your bathroom with: LED vanity lights Smart light bulbs that adjust brightness Motion-sensor lighting for convenience Bonus Tip: Consider installing a dimmer switch for a spa-like ambiance. 7. Add Personal Touches with DIY Decor Make your bathroom feel like a luxury retreat with budget-friendly decor: Plants – Low-maintenance options like aloe vera or pothos thrive in humid spaces. Artwork – Frame printable designs for an instant upgrade. Mirrors – Large mirrors enhance light and create a spacious feel. Cost-Saving Hacks: Remodeling on a Budget Repurpose What You Have – Instead of replacing cabinets, consider repainting or refinishing them. Shop Secondhand – Look for vanities, mirrors, and fixtures on Facebook Marketplace or thrift stores. Do It Yourself – Watch YouTube tutorials for guidance on plumbing, tiling, and painting. Common DIY Bathroom Remodeling Mistakes to Avoid 1. Ignoring Ventilation Needs Poor ventilation leads to mold growth. Install an exhaust fan if your bathroom lacks proper airflow. 2. Choosing the Wrong Materials Avoid materials that aren’t water-resistant, such as regular wallpaper or non-waterproof flooring. 3. Skipping Waterproofing Always waterproof areas prone to moisture, especially behind tiles and near the bathtub. FAQs About DIY Bathroom Remodeling Q: How much does a DIY bathroom remodel cost? A: Costs vary based on materials and scope but typically range from $1,500 to $5,000. Q: What are the easiest updates for an instant refresh? A: Repainting walls, upgrading fixtures, and adding new decor can make a huge impact. Q: Can I install new flooring myself? A: Yes! Follow a step-by-step guide to installing hardwood floors or consider vinyl plank flooring for an easier alternative. Conclusion & Next Steps Remodeling your bathroom doesn’t have to drain your savings. With careful planning, smart material choices, and a little DIY effort, you can create a stylish, functional space on a budget. Whether you’re upgrading fixtures, adding storage, or experimenting with home decor, small changes can make a big impact. Start your DIY bathroom remodeling journey today and transform your space without breaking the bank! Have you completed a budget-friendly bathroom remodel? Share your experience in the comments! For more DIY home projects and home renovation tips, subscribe to our newsletter. All Posts Hobbies DIY Woodworking Plans: How to Create Stunning Home Decor with Wood Read More Recording Music at Home on a Budget: The Best Equipment and Software Read More How to Make Stunning Handmade Jewelry at Home: A Step-by-Step Guide Read More Mastering the Rule of Thirds: How to Improve Your Photography Composition Read More
DIY Bathroom Remodeling: Transform Your Space Without Breaking the Bank
DIY Bathroom Remodeling: Transform Your Space Without Breaking the Bank Renovating your bathroom can be an exciting yet daunting task, especially when you’re on a tight budget. Whether you’re looking to improve functionality, boost your home’s value, or simply refresh your space, a DIY bathroom remodel can save you thousands. The good news? You don’t need to be a professional contractor to achieve stunning results. In this guide, we’ll walk you through budget-friendly home renovation techniques, DIY home projects, and home decor ideas to upgrade your bathroom without overspending. You’ll also discover practical tips, expert insights, and actionable strategies to make your remodeling journey smooth and cost-effective. Why Remodel Your Bathroom? The Benefits of a DIY Upgrade A well-designed bathroom can improve comfort, enhance efficiency, and even increase property value. Here’s why tackling a DIY bathroom remodel is a great investment: Cost Savings – Professional remodels can cost anywhere from $10,000 to $25,000, but a DIY project can be completed for a fraction of that amount. Increased Home Value – A renovated bathroom can boost your property’s resale price by 3-4%. Better Functionality – Customizing your space ensures it meets your specific needs. Energy Efficiency – Installing water-saving fixtures and LED lighting reduces utility bills. Step-by-Step Guide to an Affordable DIY Bathroom Remodel 1. Plan Your Remodel and Set a Budget Before swinging the hammer, establish a clear budget and remodeling plan. Key Considerations: Define your renovation priorities: Do you need a new vanity, fresh paint, or updated lighting? Set a realistic budget: DIY remodels typically cost between $1,500 and $5,000. Research cost-effective materials: Opt for high-quality yet affordable alternatives like peel-and-stick tiles. 2. Choose the Best Paint Colors for Small Spaces Color plays a major role in how spacious your bathroom feels. Lighter shades create an illusion of space, while dark hues can make a room feel smaller. Recommended Colors: Soft gray Pale blue Warm beige Classic white Pro Tip: Use moisture-resistant paint to prevent mold and mildew. 3. Upgrade Fixtures and Hardware Swapping out outdated fixtures is one of the easiest ways to refresh your bathroom. Consider: Installing a new faucet or showerhead Replacing cabinet handles and drawer pulls Updating towel racks and toilet paper holders Look for energy-efficient home upgrades, such as WaterSense-certified showerheads to conserve water. 4. Replace or Resurface Bathroom Tiles New tiles can be expensive, but you can achieve a modern look without a full replacement: Peel-and-stick tiles – Affordable and easy to install. Tile paint – Covers outdated designs without removing tiles. Regrouting – Makes old tiles look new again. 5. Improve Storage with Smart Solutions Maximize space and keep essentials organized with: Floating shelves for extra storage Over-the-toilet storage racks Wall-mounted baskets for toiletries 6. Install Budget-Friendly Lighting Brighten up your bathroom with: LED vanity lights Smart light bulbs that adjust brightness Motion-sensor lighting for convenience Bonus Tip: Consider installing a dimmer switch for a spa-like ambiance. 7. Add Personal Touches with DIY Decor Make your bathroom feel like a luxury retreat with budget-friendly decor: Plants – Low-maintenance options like aloe vera or pothos thrive in humid spaces. Artwork – Frame printable designs for an instant upgrade. Mirrors – Large mirrors enhance light and create a spacious feel. Cost-Saving Hacks: Remodeling on a Budget Repurpose What You Have – Instead of replacing cabinets, consider repainting or refinishing them. Shop Secondhand – Look for vanities, mirrors, and fixtures on Facebook Marketplace or thrift stores. Do It Yourself – Watch YouTube tutorials for guidance on plumbing, tiling, and painting. Common DIY Bathroom Remodeling Mistakes to Avoid 1. Ignoring Ventilation Needs Poor ventilation leads to mold growth. Install an exhaust fan if your bathroom lacks proper airflow. 2. Choosing the Wrong Materials Avoid materials that aren’t water-resistant, such as regular wallpaper or non-waterproof flooring. 3. Skipping Waterproofing Always waterproof areas prone to moisture, especially behind tiles and near the bathtub. FAQs About DIY Bathroom Remodeling Q: How much does a DIY bathroom remodel cost? A: Costs vary based on materials and scope but typically range from $1,500 to $5,000. Q: What are the easiest updates for an instant refresh? A: Repainting walls, upgrading fixtures, and adding new decor can make a huge impact. Q: Can I install new flooring myself? A: Yes! Follow a step-by-step guide to installing hardwood floors or consider vinyl plank flooring for an easier alternative. Conclusion & Next Steps Remodeling your bathroom doesn’t have to drain your savings. With careful planning, smart material choices, and a little DIY effort, you can create a stylish, functional space on a budget. Whether you’re upgrading fixtures, adding storage, or experimenting with home decor, small changes can make a big impact. Start your DIY bathroom remodeling journey today and transform your space without breaking the bank! Have you completed a budget-friendly bathroom remodel? Share your experience in the comments! For more DIY home projects and home renovation tips, subscribe to our newsletter. All Posts Hobbies DIY Woodworking Plans: How to Create Stunning Home Decor with Wood Read More Recording Music at Home on a Budget: The Best Equipment and Software Read More How to Make Stunning Handmade Jewelry at Home: A Step-by-Step Guide Read More Mastering the Rule of Thirds: How to Improve Your Photography Composition Read More

DIY Woodworking Plans: How to Create Stunning Home Decor with Wood
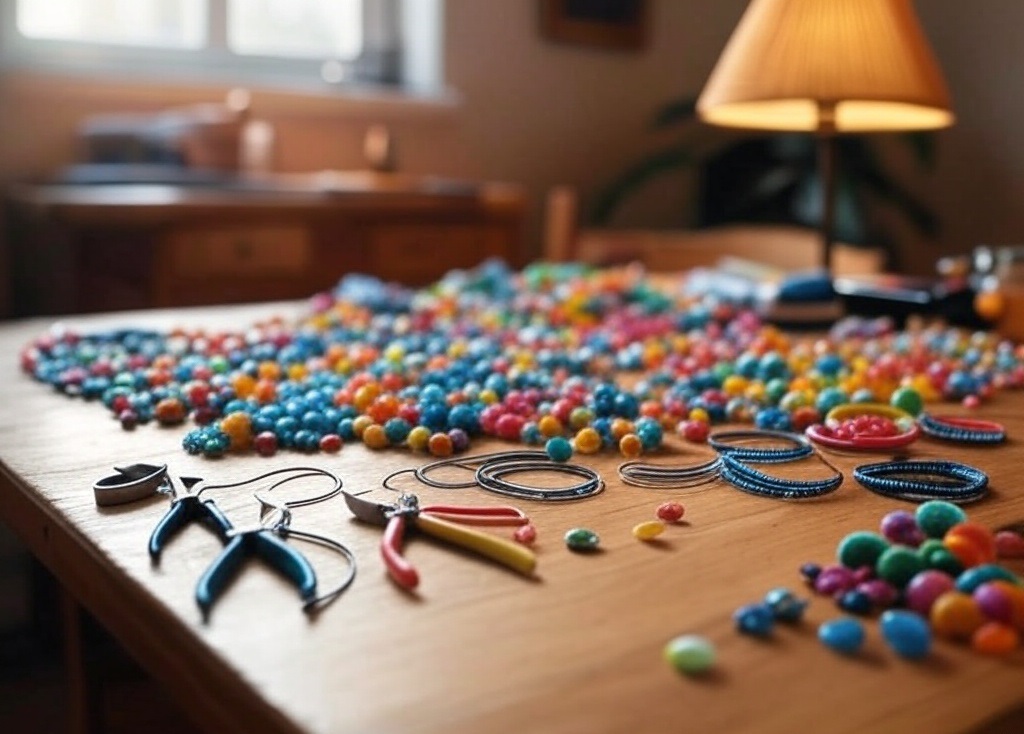
How to Make Stunning Handmade Jewelry at Home: A Step-by-Step Guide Why Handmade Jewelry is the Perfect DIY Craft Handmade jewelry is more than just a hobby—it’s a creative outlet that allows you to express yourself while making beautiful, personalized accessories. Whether you’re looking for a fulfilling DIY craft, unique home decor ideas, or heartfelt handmade gifts, making your own jewelry can be incredibly rewarding. Many beginners hesitate, thinking they need expensive tools or professional training. However, with the right guidance and some creativity, you can craft stunning pieces from the comfort of your home. In this guide, we’ll walk you through the process, from choosing materials to assembling your first handmade jewelry collection. We’ll also explore upcycling projects, paper crafting techniques, and even how to turn your hobby into a profitable Etsy store. Getting Started: Essential Materials and Tools Before diving into jewelry-making, gather these essential supplies: Basic Jewelry-Making Supplies: Beads and Charms – Glass, wooden, or resin beads for added uniqueness. Jewelry Wire – 20 to 24 gauge wire works well for most projects. Jump Rings and Clasps – Essential for fastening necklaces and bracelets. Pliers (Round-Nose, Flat-Nose, Wire Cutters) – Helps in shaping and cutting wires. Elastic Cord or Thread – For easy-to-wear, stretchable jewelry. Glue and Resin – Adds durability and creativity to your designs. Step-by-Step Guide to Making Personalized Jewelry 1. Choosing Your Jewelry Type Decide what you want to create: Bracelets – Simple and great for beginners. Necklaces – Perfect for layering and personalization. Earrings – Dangle, studs, or hoops for variety. Rings – Minimalist or statement designs. 2. Designing Your Jewelry Sketch Your Ideas: Use a notebook to plan your design. Select Your Color Palette: Choose colors that complement outfits. Experiment with Textures: Mix different materials like leather, metal, and beads. 3. Assembling Your Jewelry Beaded Bracelet: String beads onto elastic cord, tie knots securely, and apply glue. Wire-Wrapped Pendant: Shape wire around a stone or charm, forming a loop at the top. Earrings: Attach charms or beads to earring hooks using pliers and jump rings. Upcycling Projects: Turning Old Items into Stunning Jewelry Repurpose old jewelry, buttons, or even fabric scraps into new accessories. Some ideas include: Repurposing Old Necklaces: Convert broken chains into stylish charm bracelets. Using Vintage Buttons: Attach buttons to ring bases for unique, statement jewelry. Fabric and Leather Scraps: Cut into shapes and combine with metal charms for earrings. Best Craft Ideas for Kids During Holidays Crafting jewelry can be a fun family activity, especially during the holidays. Here are some kid-friendly ideas: Friendship Bracelets: Simple knotting techniques using colorful threads. Clay Pendants: Kids can mold shapes, bake, and paint their own designs. Button Rings: Glue colorful buttons onto ring bases for easy DIY gifts. How to Start an Etsy Store Selling Handmade Items If you fall in love with jewelry-making, why not turn it into a business? Follow these steps: 1. Set Up Your Etsy Store Create an account on Etsy.com. Choose a catchy store name that reflects your brand. Upload a professional profile picture and banner. 2. List Your Products Take high-quality photos with good lighting. Write compelling descriptions using keywords like DIY crafts, home decor ideas, and handmade gifts. Price your items competitively by researching similar products. 3. Market Your Store Leverage Social Media: Share your designs on Instagram and Pinterest. Optimize for SEO: Use keywords in product titles and descriptions. Offer Discounts: Attract first-time buyers with limited-time deals. Common Jewelry-Making Mistakes and How to Fix Them 1. Loose Knots in Bracelets Fix: Use double knots and secure with a drop of glue. 2. Jewelry Breaking Easily Fix: Reinforce connections with sturdy jump rings and crimp beads. 3. Tarnishing Metal Components Fix: Use anti-tarnish sprays or store in airtight bags. Expert Insights: Trends in Handmade Jewelry According to jewelry designer Lisa Schwartz, minimalist designs and upcycled materials are trending. A report by Etsy (2024) states that searches for sustainable handmade jewelry have increased by 35% over the past year. Final Thoughts: Create, Gift, or Sell Your Handmade Jewelry Jewelry-making is an accessible and rewarding DIY craft that allows you to create home decor ideas and handmade gifts that are both stylish and personal. Whether crafting for fun, gifting loved ones, or starting an Etsy store, you now have the knowledge to begin your jewelry-making journey. What’s Next? Try making your first bracelet today! Share your designs on social media and tag fellow crafters. If you’re serious about selling, start setting up your Etsy shop. All Posts Hobbies Mastering the Rule of Thirds: How to Improve Your Photography Composition Read More

The Best Wood Types for Furniture Making and Their Pros & Cons
Survival Skills for Wilderness Adventures: How to Stay Safe Outdoors Picture this: You’re deep in the woods, surrounded by towering trees, the sound of a nearby stream trickling, and the crisp air filling your lungs. But suddenly, your GPS loses signal, the sun begins to set, and you realize you’re lost. Would you know what to do? Outdoor adventures can be exhilarating, but they also come with risks. Whether you’re an avid camper, hiker, or fisherman, having the right outdoor survival skills can mean the difference between a minor inconvenience and a life-threatening situation. In this guide, we’ll cover essential survival tactics, including fishing tips, how to choose the best camping gear, and strategies to set up a secure campsite. Whether you’re embarking on a solo trip or a group expedition, these expert insights will prepare you for any challenge. Essential Outdoor Survival Skills Every Adventurer Should Know 1. Mastering Fire-Building Techniques A fire isn’t just for warmth—it’s crucial for cooking, purifying water, and signaling for help. Follow these steps to build a fire in any condition: Find dry tinder (birch bark, dry leaves, cotton balls coated in petroleum jelly). Use the teepee method—place small sticks in a cone shape around the tinder. Gradually add larger wood while maintaining airflow. If it’s raining, use waterproof matches or a magnesium fire starter. Pro Tip: Always have a fire-starting kit in your survival pack. 2. Finding and Purifying Water in the Wild Dehydration can be a silent killer. If you don’t have bottled water, try these methods: Locate freshwater sources like streams, rivers, or collected rainwater. Boil the water for at least 1 minute to kill bacteria. Use portable water filters like LifeStraw or iodine tablets. Case Study: A study from the CDC found that 90% of backcountry water sources in the U.S. contain harmful bacteria. Always purify your water! 3. Building a Safe Shelter A proper shelter protects you from the elements and helps retain body heat. Choose a location away from flood zones and strong winds. Tarp shelter: Lightweight and easy to set up with ropes. Lean-to: Ideal in wooded areas, using tree branches and leaves. Snow cave: Essential for winter survival, providing insulation against the cold. Fishing Tips for Survival and Recreation Fishing isn’t just a hobby—it’s a crucial survival skill. Whether you’re catching fish for food or sport, choosing the right fishing rod and using proper techniques matter. 1. Choosing the Right Fishing Rod for Wilderness Fishing The best fishing rod depends on where and what you’re fishing for: Telescopic rods – Compact and perfect for backpacking. Spinning rods – Versatile for various fish species. Fly fishing rods – Best for streams and rivers. 2. The Ultimate Guide to Freshwater Fishing Techniques Bottom fishing: Best for catching catfish or carp in deep waters. Fly fishing: Effective in fast-moving rivers. Trolling: Dragging bait behind a boat for larger fish. Expert Insight: “Knowing when and where to fish is just as important as the technique. Dawn and dusk are often the most productive times,” says professional angler John Smith. Best Camping Gear for a Safe and Comfortable Trip 1. Must-Have Camping Essentials Investing in the best camping gear ensures a comfortable experience: Sleeping bag: Choose based on the season and insulation rating. Tent: A waterproof, well-ventilated tent is a must. Survival knife: Useful for cutting wood, preparing food, and protection. Headlamp or flashlight: Essential for nighttime navigation. First aid kit: Include bandages, antiseptics, and medications. 2. How to Set Up a Campsite Like a Pro Pick a flat, dry spot at least 200 feet away from water sources. Check for falling hazards like dead tree branches. Store food properly to avoid attracting wildlife—use bear-proof containers. Keep your fire pit at a safe distance from tents. Hiking Trail Recommendations for Every Skill Level Best Hiking Trails for Beginners in the U.S. If you’re new to hiking, start with beginner-friendly trails: Blue Hills Reservation, Massachusetts – Gentle slopes, scenic views. Great Smoky Mountains National Park, Tennessee – Easy loops with wildlife sightings. Yosemite Valley Loop Trail, California – Stunning views with minimal elevation gain. Pro Tip: Always check trail difficulty, weather forecasts, and carry a detailed map or GPS device. How to Plan a Successful Wilderness Survival Trip 1. Create a Wilderness Survival Checklist Before heading out, ensure you have: ✔ Navigation tools (GPS, map, compass) ✔ Food and water supplies ✔ Shelter and warmth essentials ✔ Emergency medical supplies ✔ Multi-purpose tools and fire starters 2. Training and Preparation Take a basic survival course—many are available online. Practice setting up camp before you go. Learn basic first aid and CPR techniques. Social Proof: Outdoor expert Bear Grylls states, “Preparation is the key to survival. The more you train, the safer you’ll be.” Conclusion: Ready to Take on the Wild? Survival skills are crucial for anyone venturing into nature. Whether you’re fishing, camping, or hiking, the right knowledge and preparation ensure safety and enjoyment. By equipping yourself with the best gear, mastering survival techniques, and staying aware of potential risks, you can confidently explore the great outdoors. Next Steps: ✅ Share this guide with fellow adventurers. ✅ Subscribe to our newsletter for more outdoor survival tips. ✅ Check out our recommended best camping gear and fishing essentials here! All Posts Hobbies DIY Pet Toys: Fun and Affordable Ways to Keep Your Dog Entertained Read More The Ultimate Skincare Routine for Glowing Skin: A Step-by-Step Guide Read More DIY Bathroom Remodeling: Transform Your Space Without Breaking the Bank Read More DIY Woodworking Plans: How to Create Stunning Home Decor with Wood Read More Recording Music at Home on a Budget: The Best Equipment and Software Read More How to Make Stunning Handmade Jewelry at Home: A Step-by-Step Guide Read More Mastering the Rule of Thirds: How to Improve Your Photography Composition Read More

Recording Music at Home on a Budget: The Best Equipment and Software
How to Make Stunning Handmade Jewelry at Home: A Step-by-Step Guide Why Handmade Jewelry is the Perfect DIY Craft Handmade jewelry is more than just a hobby—it’s a creative outlet that allows you to express yourself while making beautiful, personalized accessories. Whether you’re looking for a fulfilling DIY craft, unique home decor ideas, or heartfelt handmade gifts, making your own jewelry can be incredibly rewarding. Many beginners hesitate, thinking they need expensive tools or professional training. However, with the right guidance and some creativity, you can craft stunning pieces from the comfort of your home. In this guide, we’ll walk you through the process, from choosing materials to assembling your first handmade jewelry collection. We’ll also explore upcycling projects, paper crafting techniques, and even how to turn your hobby into a profitable Etsy store. Getting Started: Essential Materials and Tools Before diving into jewelry-making, gather these essential supplies: Basic Jewelry-Making Supplies: Beads and Charms – Glass, wooden, or resin beads for added uniqueness. Jewelry Wire – 20 to 24 gauge wire works well for most projects. Jump Rings and Clasps – Essential for fastening necklaces and bracelets. Pliers (Round-Nose, Flat-Nose, Wire Cutters) – Helps in shaping and cutting wires. Elastic Cord or Thread – For easy-to-wear, stretchable jewelry. Glue and Resin – Adds durability and creativity to your designs. Step-by-Step Guide to Making Personalized Jewelry 1. Choosing Your Jewelry Type Decide what you want to create: Bracelets – Simple and great for beginners. Necklaces – Perfect for layering and personalization. Earrings – Dangle, studs, or hoops for variety. Rings – Minimalist or statement designs. 2. Designing Your Jewelry Sketch Your Ideas: Use a notebook to plan your design. Select Your Color Palette: Choose colors that complement outfits. Experiment with Textures: Mix different materials like leather, metal, and beads. 3. Assembling Your Jewelry Beaded Bracelet: String beads onto elastic cord, tie knots securely, and apply glue. Wire-Wrapped Pendant: Shape wire around a stone or charm, forming a loop at the top. Earrings: Attach charms or beads to earring hooks using pliers and jump rings. Upcycling Projects: Turning Old Items into Stunning Jewelry Repurpose old jewelry, buttons, or even fabric scraps into new accessories. Some ideas include: Repurposing Old Necklaces: Convert broken chains into stylish charm bracelets. Using Vintage Buttons: Attach buttons to ring bases for unique, statement jewelry. Fabric and Leather Scraps: Cut into shapes and combine with metal charms for earrings. Best Craft Ideas for Kids During Holidays Crafting jewelry can be a fun family activity, especially during the holidays. Here are some kid-friendly ideas: Friendship Bracelets: Simple knotting techniques using colorful threads. Clay Pendants: Kids can mold shapes, bake, and paint their own designs. Button Rings: Glue colorful buttons onto ring bases for easy DIY gifts. How to Start an Etsy Store Selling Handmade Items If you fall in love with jewelry-making, why not turn it into a business? Follow these steps: 1. Set Up Your Etsy Store Create an account on Etsy.com. Choose a catchy store name that reflects your brand. Upload a professional profile picture and banner. 2. List Your Products Take high-quality photos with good lighting. Write compelling descriptions using keywords like DIY crafts, home decor ideas, and handmade gifts. Price your items competitively by researching similar products. 3. Market Your Store Leverage Social Media: Share your designs on Instagram and Pinterest. Optimize for SEO: Use keywords in product titles and descriptions. Offer Discounts: Attract first-time buyers with limited-time deals. Common Jewelry-Making Mistakes and How to Fix Them 1. Loose Knots in Bracelets Fix: Use double knots and secure with a drop of glue. 2. Jewelry Breaking Easily Fix: Reinforce connections with sturdy jump rings and crimp beads. 3. Tarnishing Metal Components Fix: Use anti-tarnish sprays or store in airtight bags. Expert Insights: Trends in Handmade Jewelry According to jewelry designer Lisa Schwartz, minimalist designs and upcycled materials are trending. A report by Etsy (2024) states that searches for sustainable handmade jewelry have increased by 35% over the past year. Final Thoughts: Create, Gift, or Sell Your Handmade Jewelry Jewelry-making is an accessible and rewarding DIY craft that allows you to create home decor ideas and handmade gifts that are both stylish and personal. Whether crafting for fun, gifting loved ones, or starting an Etsy store, you now have the knowledge to begin your jewelry-making journey. What’s Next? Try making your first bracelet today! Share your designs on social media and tag fellow crafters. If you’re serious about selling, start setting up your Etsy shop. All Posts Hobbies Mastering the Rule of Thirds: How to Improve Your Photography Composition Read More
How to Make Stunning Handmade Jewelry at Home: A Step-by-Step Guide
How to Make Stunning Handmade Jewelry at Home: A Step-by-Step Guide Why Handmade Jewelry is the Perfect DIY Craft Handmade jewelry is more than just a hobby—it’s a creative outlet that allows you to express yourself while making beautiful, personalized accessories. Whether you’re looking for a fulfilling DIY craft, unique home decor ideas, or heartfelt handmade gifts, making your own jewelry can be incredibly rewarding. Many beginners hesitate, thinking they need expensive tools or professional training. However, with the right guidance and some creativity, you can craft stunning pieces from the comfort of your home. In this guide, we’ll walk you through the process, from choosing materials to assembling your first handmade jewelry collection. We’ll also explore upcycling projects, paper crafting techniques, and even how to turn your hobby into a profitable Etsy store. Getting Started: Essential Materials and Tools Before diving into jewelry-making, gather these essential supplies: Basic Jewelry-Making Supplies: Beads and Charms – Glass, wooden, or resin beads for added uniqueness. Jewelry Wire – 20 to 24 gauge wire works well for most projects. Jump Rings and Clasps – Essential for fastening necklaces and bracelets. Pliers (Round-Nose, Flat-Nose, Wire Cutters) – Helps in shaping and cutting wires. Elastic Cord or Thread – For easy-to-wear, stretchable jewelry. Glue and Resin – Adds durability and creativity to your designs. Step-by-Step Guide to Making Personalized Jewelry 1. Choosing Your Jewelry Type Decide what you want to create: Bracelets – Simple and great for beginners. Necklaces – Perfect for layering and personalization. Earrings – Dangle, studs, or hoops for variety. Rings – Minimalist or statement designs. 2. Designing Your Jewelry Sketch Your Ideas: Use a notebook to plan your design. Select Your Color Palette: Choose colors that complement outfits. Experiment with Textures: Mix different materials like leather, metal, and beads. 3. Assembling Your Jewelry Beaded Bracelet: String beads onto elastic cord, tie knots securely, and apply glue. Wire-Wrapped Pendant: Shape wire around a stone or charm, forming a loop at the top. Earrings: Attach charms or beads to earring hooks using pliers and jump rings. Upcycling Projects: Turning Old Items into Stunning Jewelry Repurpose old jewelry, buttons, or even fabric scraps into new accessories. Some ideas include: Repurposing Old Necklaces: Convert broken chains into stylish charm bracelets. Using Vintage Buttons: Attach buttons to ring bases for unique, statement jewelry. Fabric and Leather Scraps: Cut into shapes and combine with metal charms for earrings. Best Craft Ideas for Kids During Holidays Crafting jewelry can be a fun family activity, especially during the holidays. Here are some kid-friendly ideas: Friendship Bracelets: Simple knotting techniques using colorful threads. Clay Pendants: Kids can mold shapes, bake, and paint their own designs. Button Rings: Glue colorful buttons onto ring bases for easy DIY gifts. How to Start an Etsy Store Selling Handmade Items If you fall in love with jewelry-making, why not turn it into a business? Follow these steps: 1. Set Up Your Etsy Store Create an account on Etsy.com. Choose a catchy store name that reflects your brand. Upload a professional profile picture and banner. 2. List Your Products Take high-quality photos with good lighting. Write compelling descriptions using keywords like DIY crafts, home decor ideas, and handmade gifts. Price your items competitively by researching similar products. 3. Market Your Store Leverage Social Media: Share your designs on Instagram and Pinterest. Optimize for SEO: Use keywords in product titles and descriptions. Offer Discounts: Attract first-time buyers with limited-time deals. Common Jewelry-Making Mistakes and How to Fix Them 1. Loose Knots in Bracelets Fix: Use double knots and secure with a drop of glue. 2. Jewelry Breaking Easily Fix: Reinforce connections with sturdy jump rings and crimp beads. 3. Tarnishing Metal Components Fix: Use anti-tarnish sprays or store in airtight bags. Expert Insights: Trends in Handmade Jewelry According to jewelry designer Lisa Schwartz, minimalist designs and upcycled materials are trending. A report by Etsy (2024) states that searches for sustainable handmade jewelry have increased by 35% over the past year. Final Thoughts: Create, Gift, or Sell Your Handmade Jewelry Jewelry-making is an accessible and rewarding DIY craft that allows you to create home decor ideas and handmade gifts that are both stylish and personal. Whether crafting for fun, gifting loved ones, or starting an Etsy store, you now have the knowledge to begin your jewelry-making journey. What’s Next? Try making your first bracelet today! Share your designs on social media and tag fellow crafters. If you’re serious about selling, start setting up your Etsy shop. All Posts Hobbies Mastering the Rule of Thirds: How to Improve Your Photography Composition Read More

Mastering the Rule of Thirds: How to Improve Your Photography Composition
Mastering the Rule of Thirds: How to Improve Your Photography Composition Have you ever taken a photo that just doesn’t look right, even though everything in the frame seems interesting? That’s because composition plays a huge role in photography, and one of the most powerful yet simple photography techniques to improve your shots is the Rule of Thirds. Understanding and applying this technique can take your photos from ordinary to visually compelling, whether you’re using a best budget camera for beginners or a high-end DSLR. In this guide, we’ll break down the Rule of Thirds, explain why it works, and show you how to apply it in different photography scenarios—from portrait photography settings to outdoor photography ideas. We’ll also explore how to fine-tune your compositions using editing photos in Lightroom. Ready to level up your photography skills? Let’s dive in! What is the Rule of Thirds? The Rule of Thirds is a fundamental photography technique that divides your frame into a 3×3 grid, creating nine equal parts. The idea is to place key elements of your composition along these lines or at their intersections. This technique creates balance and guides the viewer’s eye naturally across the image. Why Does the Rule of Thirds Work? Creates balance – A centered subject can feel static, while placing it off-center adds visual interest. Mimics natural eye movement – Our eyes are naturally drawn to intersection points. Enhances storytelling – Composing shots with the Rule of Thirds adds depth and structure. How to Apply the Rule of Thirds in Different Photography Styles 1. Portrait Photography Settings and Composition For portrait photography, positioning your subject’s eyes along the upper horizontal line makes the image feel natural and engaging. Here’s how: Single Subject: Place the face near an intersection point rather than in the center. Multiple Subjects: Align them along vertical grid lines to create symmetry. Background Considerations: Use a blurred background (bokeh) for emphasis. Best Camera Settings: Aperture: f/1.8 to f/2.8 for a shallow depth of field Shutter Speed: 1/200s or higher ISO: 100-400 (adjust based on lighting) 2. Outdoor Photography Ideas Using the Rule of Thirds For landscapes and outdoor shots, aligning the horizon with the top or bottom third of the frame makes the composition more dynamic. Landscapes: Place the horizon on the top third if the foreground is interesting; place it on the bottom third if the sky is dramatic. Action Shots: Keep moving subjects along a vertical third for dynamic tension. Leading Lines: Align paths, rivers, or roads with grid lines to guide the viewer’s eye. 3. How to Take Professional-Quality Pictures with a Smartphone Yes, you can master the Rule of Thirds even with a phone! Turn on Gridlines: Most smartphones allow you to enable the grid in camera settings. Use Natural Light: Soft morning or golden hour light improves composition. Avoid Over-Reliance on Zoom: Instead, physically move closer to the subject. Edit with Lightroom: Crop and fine-tune exposure for better balance. Editing Photos in Lightroom to Perfect the Rule of Thirds Even if you didn’t get the composition perfect while shooting, editing photos in Lightroom can help refine your image: Use the Crop Tool: Lightroom’s built-in grid overlay makes it easy to realign your shot. Adjust Exposure: Enhancing brightness and contrast ensures focus on key elements. Apply Color Grading: This enhances mood and makes compositions stand out. Common Misconceptions About the Rule of Thirds “It’s a strict rule” – While it’s a great guideline, breaking it creatively can also produce compelling images. “It only applies to professional cameras” – Any camera, including smartphones and best budget cameras for beginners, can use this technique. “Centered compositions are bad” – Sometimes symmetry works better, depending on the subject. The Science Behind the Rule of Thirds Studies in visual perception suggest that people find off-center compositions more engaging. Research from the Journal of Vision indicates that people naturally scan images in an F-shaped pattern, aligning with the Rule of Thirds grid. Expert Opinions on the Rule of Thirds “The Rule of Thirds is not about following strict rules but about understanding visual harmony.” – Annie Leibovitz, Renowned Portrait Photographer “You can break the rule once you master it, but it remains a great starting point for beginners.” – Steve McCurry, National Geographic Photographer Final Thoughts: When to Use (or Break) the Rule of Thirds The Rule of Thirds is a valuable tool for enhancing your compositions, but the best photographers know when to break it. Once you understand its principles, experiment with symmetry, negative space, and leading lines to create truly unique photos. What’s Next? Practice: Use the gridlines on your camera or smartphone to compose shots intentionally. Experiment: Try breaking the rule and compare results. Edit: Use editing photos in Lightroom to refine compositions. Upgrade Gear: If you’re looking for new equipment, check out best budget cameras for beginners to improve your shots. Start applying the Rule of Thirds today and take your photography to the next level!